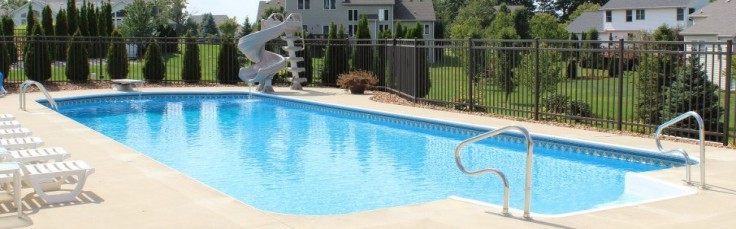
So, you’re ready to close your pool up for the winter. While it may not bring a smile to your face, closing your pool the right way will make a huge difference on how it looks when you open it in the spring. You’ve got your winter closing supplies ready and now what?
First, let’s clear up some of the common mistakes made at some pool closings.
It’s okay if I use milk jugs full of water to hold my cover down, I don’t need anything else. Wrong! Of course a milk jug of water will hold the cover down, but think of the wear caused from those heavy water “weights.” The stress of the milk jugs on the cover will stretch out the cover and cause require replacement much sooner than you planned. Not only that, nothing is holding the cover secure against the top rails of the pool and it’s easy for strong winds to get up and under the cover and move it about. Now those milk jugs will be flying up and down, the cover will feel the stress of being pulled down even more and it will be pounding on the top rails which could result in paint chipping away. Let’s not even think about what could happen if the milk jugs come loose and slam against the pool wall. It’s best to use a combination of water tubes, pillows, and cable. In high wind areas, cover clips are recommended.
The best way to keep water from collecting on my cover is to just put an auto-pump on it and leave it there all winter. Hmmmm, in theory, that’s a GREAT idea, but winter covers are not water proof. Water can still seep through the cover into the pool. Likewise, water can be pulled out of the pool through the cover. So, it stands to reason if you put an auto-pump on the pool all winter long, at some point it will start to pull the pool water through the pump and out of your pool. This is not good. Periodic removal of water is best or using an EZ Drain Winter Cover instead of a traditional pool cover.
It’s better to deal with a green pool in the spring than worry about clearing it up now. Nope, not really. This may come as a surprise to you, but if you close it green it will be green when you open it. And, because it will be warm when you open your pool, it’s going to take even more chemicals to clear it. The warmer water uses up chemicals more quickly than at cooler temperatures. Chances are it will be even MORE green than when you closed it. Algae can live in water as cold as 60 degrees farenheit. So, bring your water into your local pool company for a water test (we offer FREE water testing at all of our locations), get the chemicals you need and close your pool looking good. You’ll appreciate it in the spring when you open to a clean pool instead of a green pool.
Alright, enough of that, let’s get you going. Let’s start by WINTERIZING YOUR POOL & EQUIPMENT.
If you want, you can watch a video on pool closing tips and information.
Step 1 – Repair All Leaks. Covering a pool that has a leak could cause unrepairable damage to the liner. Yikes! That’ll be expensive.
Step 2 – Balance Chemicals. Not balancing your pool water prior to closing will allow the water to become very corrosive at lower water temperatures. This can cause damage to the pool surface and equipment. Take your water into your local pool dealer for a water test. Find a Zagers near you!
Step 3 – Brush, vacuum and clean – Be sure to thoroughly clean all pool surfaces and the waterline. Cleaning the waterline will help prevent permanent discoloring.
Step 4 – Remove equipment – Remove ladders, stairs, auto vacs, skimmer weir or door, flow control flap, and skimmer basket. Store these items where they will not be exposed to the harsh conditions of winter weather.
Step 5 – Add Winter Shock – Winter Shock oxidizes wastes, keeps pool surfaces clean, helps prevent algae growth and other problems that can occur over the winter months. Winter Shock is specially designed to work within lower water temperatures and conditions found in closed swimming pools. Run the pump and filter for several hours to circulate the water.
Step 6 – Add Winter Algaecide – Algaecide should be added directly to pool water around the edge of the pool. Run the pump and filter for several hours to circulate the water.
Step 7 – Lower Water Level – If you are using an Aqua Seal, Aquador or Winter Plug, the water level only needs to be lowered to the lower of the two waterline marks on your skimmer faceplate. If not, the water level should be lowered several inches below the skimmer and return openings (or jets).
Step 8 – Put on Skimmer Cover – Snap on the lid or seal to the faceplate of your skimmer. Go around the edges to make sure it is on tight. You can also lube around the edges to get a tighter seal.
Step 9 – Place Winter Discs or Return (Jet) Plug – If you have a Doughboy pool, you should have Winter Discs to put into each return (or jet) outlet. With a Doughboy, you’ll need to take off the return (or jet) plate that holds in the eyeball. Take out the eyeball and replace with the winter disc. Then, thread the faceplate back on. For all other pools, you’ll need threaded winter plugs. Remove the return (or jet) face plate, eyeball and inner connector. Lube the o-ring on the threaded plug and then twist it into place. If you have a light in your return (or jet), remove the bulb and replace it with a #9 winter plug.
Step 10 – Tie off floatation pillows – If you’ve got a round pool, you should have one air pillow in the center of the pool. If you have an oval pool, one pillow at each end will be enough. It’s very important that you do not inflate the pillows all the way. Instead, inflate them about 3/4 , or until a foot or hand can be placed in the center of the pillow and touch the ground. This will be sure to allow pressure on the pillow and not on the winter cover or walls of your pool.
Step 11 – Disconnect & Drain the filter – You’ll have to take things a little differently depending on the type of filter you have. For SAND FILTERS – pour or pump out the sand, clean the tank and store both the pump and filter inside. CARTRIDGE OR D.E. FILTERS – Drain the filter, remove the grids and clean thoroughly with a cleaner and de-greaser. Inspect grids for any broken pieces and store separated out until spring. Store the pump and filter inside.
Step 12 – Disconnect & Drain Chlorinator – If you have an automatic chlorinator be sure to disconnect the hoses and discard any undissolved chlorine tabs. If you have a mineral pack, that should also be thrown away and replaced in the spring. If possible, it’s best to keep any auto-chlorinators stored out of the winter weather.
Step 13 – Winterize the Heater – Start by turning off the pilot light and closing the main valve to the heater. Remove the plug and drain out the water. To be extra safe, it’s always a good idea to use compressed air to blow the water out. Be sure to disconnect the pressure switch and check the original owners manual for any other details relating to winterizing.
Step 14 – Protect your Pool Chemicals – Do you have chemicals left over from the swimming season? It’s always a good idea to store them in a cool, dry place where they won’t freeze. Also, be careful to store them away from metals, lawn mowers, cars, paints, thinners, gasoline, kerosene, snowblowers, oil and other volatile materials.
Step 15 – Clean & Store your Solar Cover – Protect your solar cover by cleaning it before putting it away for the winter. You can use Bioguard Stow-Away to clean it and then put on a protective layer for storing. This will help keep mice and other rodents from damaging and nesting inside your solar cover. DO NOT STORE IN WATER.
Hold on pardner, we are almost done. So, after you’ve checked and re-checked to make sure you’ve followed all the steps listed above, you can get onto to covering the pool.
Start by tying off floatation pillows, if not already done.
Then, position the cover so the colored side is up and the black side is down. The colored side has UV protection on it. Position it evenly and pull the cable tight through the ratchet to secure.
Next, add weight. Position your water tubes prior to filling. Water tubes go right on the inside of the top rails on top of the cover. Fill only 1/2 way to allow for expansion from freezing. Typically, winter cover warranties do not apply to wind damage. It’s your responsibility to make sure it’s secure from blowing up and off the pool. Water tube chart for aboveground pools.
Now, secure with cover clips or locs. This is especially helpful in areas that experience, or have a good chance of, high winds. The inner piece attaches to the top rail PRIOR TO securing the winter cover and the outer piece clips on over the inner piece and cover. Wind can not get under the cover and flap it around.
Lastly, install the leaf net. Leaf Nets will make spring clean up easy. It’ll catch all the leaves, sticks and other debris before getting settled in the winter cover and frozen in the ice. Be sure to remove the leaf net PRIOR TO THE FIRST SNOW FALL. Then you can put it back on in the spring, prior to opening.
So, THAT’S IT! You’ve closed your pool and your ready for the winter months. BUT, before you go, here’s just a few things I’d like you to know:
- REMEMBER – clean pool in fall = clean pool in spring
- NO CHLORINE AFTER COVERING – you want chemicals circulating with the cover off
- CHECK YOUR COVER – once in a while, walk around and check your cover for areas of stress. You may need to get some water off.
- NO HANGING WEIGHT – hanging weight from the cover will definitely stress the cover and cause premature damage.
If I’ve missed anything or if you have a question, just let me know. I’ll be happy to answer any questions!
THANK YOU!!

I have had to drain my pool completely this year. Will it hurt not to put any water back into the liner until I’m ready to re-open it
Thanks-Joe
Hi Joe,
Usually once the water is drained completely out of a lined pool there will be wrinkles impossible to get back out but, we do recommend having water in both in ground and above ground pools throughout the winter to help with the structural support of the pool. Putting water in will help avoid any walls caving in or supports breaking – especially with in grounds as the ground expands and contracts with the weather. Does this make sense?
We have a question. We live in a very cold climate (Saskatchewan). We followed all the steps, drained our pool to about a foot below the return, and put on the winter cover. It was resting on the pool surface and the wire was tight around the outside supports (18 x 33′ above ground) . Yesterday, we notice our cover is OFF! and sitting on the pool surface, the water is frozen and markedly lower then where we drained it to. It’s obvious there is a leak of some kind. We are planning on a new liner in the Spring (it’s been 10 years) but need to know if this will be bad for the pool in any other way? Should we turn on our water, and add some in there? or leave it?
Hi Sheila,
We definitely would recommend adding water if you can – it depends where the water level is now. You want the pool to be at least half full of water all winter because the water “holds” the pool together so to speak. If the water drains out, the walls can collapse (especially on a larger oval shape like you have) Just keep an eye on it throughout the winter. The leak could be high on the liner and you won’t need to add any water or the leak could be on the bottom and you’ll want to keep it filled until spring when you can replace the liner.
Hope this helps!!